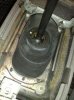
View attachment 1606
This information was adapted from the GTi-R Austrailia groups. They get full props for this. I may have a few bits wrong but this is me trying to remember how i got the damned assembly out.
Tools needed
Ratchet with at least a 6" extention
10mm socket
12mm deep socket
13mm spanner
14mm spanner and socket
bench vise
angle grinder with cutting/grinding disk
hammer
flat head screwdriver
Step 1
Remove shifter knob
Step 2
Remove plasic trim attached to the shifter boot from the center console. Set aside
Step 3
Using the 10mm socket and remove the two forward most screws holding the inner boot to the floor.
Step 4
Get under the car with the 10mm socket with the extention and remove the 4 10mm nuts to the rear most of the shifter assembly. The inner shift boot can now be lifted away. Set aside.
Step 5
Get back under the car with the 13mm and 14mm spanners or sockets (if you are fortunate enough to have 2 ratchets). Loosen and remove the shifter linkage from the shifter itself. The bolt will need a little wiggling to get out of there.
Step 6
Take the 12mm socket and remove the 2 12mm nuts holding the shifter to the floor. You can now pull the shifter from the floor.
Step 7
Take the shifter to the bench vise and tighten it very securly on the ball (not Hulk tight as you dont want to crack the ball). Stick the flat head screwdriver through the for lack of a technical term "a$$ of the shifter" and twist 90*.
Step 8
Loosen the bench vise, place the shifter in the bench vise so the clamp is just under the ball (the shifter should be upside down). Do not tighten the vise on the shaft, just enough so the ball will not go through it. Beat the a$$ of the shifter sil the ball goes as far down as it can.
Step 9
Secure the long part of the shaft in the bench vise. Take your angle grinder and make three notches right above the other 3 already on the shifter's shaft (you will see what i mean when you move the ball). There are to be 3 notches on opposite sides of eachother. You can chose at this point to cut a little off the top of the shifter. I'd say 2" max.
Step 10
Once the shifter has cooled from the grinding coat the freshly cut grooves with epoxy. Put the a$$ of the shifter loosely in the bench vise and pound he top of the shifter till the ball covers the new groves you have cut.
Step 11
Place the ball in the bench vise securely and twist the shifter 90* using the screwdriver. Let the epoxy setup before replacing the shifter
Step 12
Re-install the shifter and enjoy
Attachments
-
 9.3 KB Views: 2